Quick answer: Compress image to 50KB in four steps: open Compress Image, add your photo, set the target to 50 KB (or a little under, such as 48 KB), press Compress and download the result. If it looks blurry, resize the image to about 800 pixels on its long side first, then compress it again.
In this guide
Job portals, government websites, exam registrations and university applications often cap photo uploads at 50 KB, 100 KB or 200 KB. A photo straight from your phone is usually 2–5 MB, which is 40 to 100 times over a 50 KB limit. Squeezing it down is easy. Squeezing it down without ending up with a smudgy, pixelated picture takes one extra step that most guides skip.
Here is the whole process, why 50 KB can look bad, and how to fix it.
How to compress an image to 50KB, step by step
- Open the tool. Go to Compress Image on your phone or computer. There is no sign-up and no app to install.
- Add your image. Drop in a JPG, PNG or WebP file, or tap the box to choose one from your gallery. You can add several files at once.
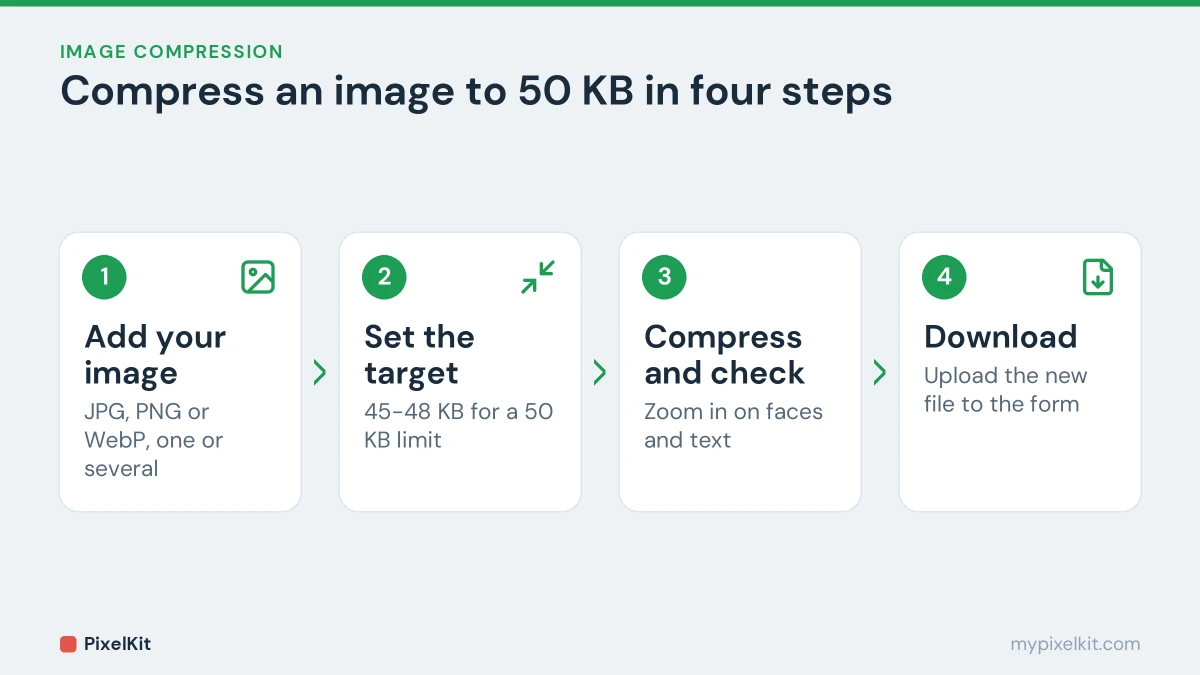
- Set the target size. Move the slider to your limit. Aim a few kilobytes under it, for example 45–48 KB for a 50 KB cap (the next sections explain why).
- Compress and check. The tool re-encodes the image to land at or under your target and shows the size before and after. Open the result and zoom in to check that faces and text still look sharp.
- Download and upload. Save the compressed file and upload it to the form.
The compression happens entirely in your browser, so your photo never leaves your device. That matters when the image is an ID photo, a signature or a scanned document.
Why a 50KB image can look blurry, and how to fix it
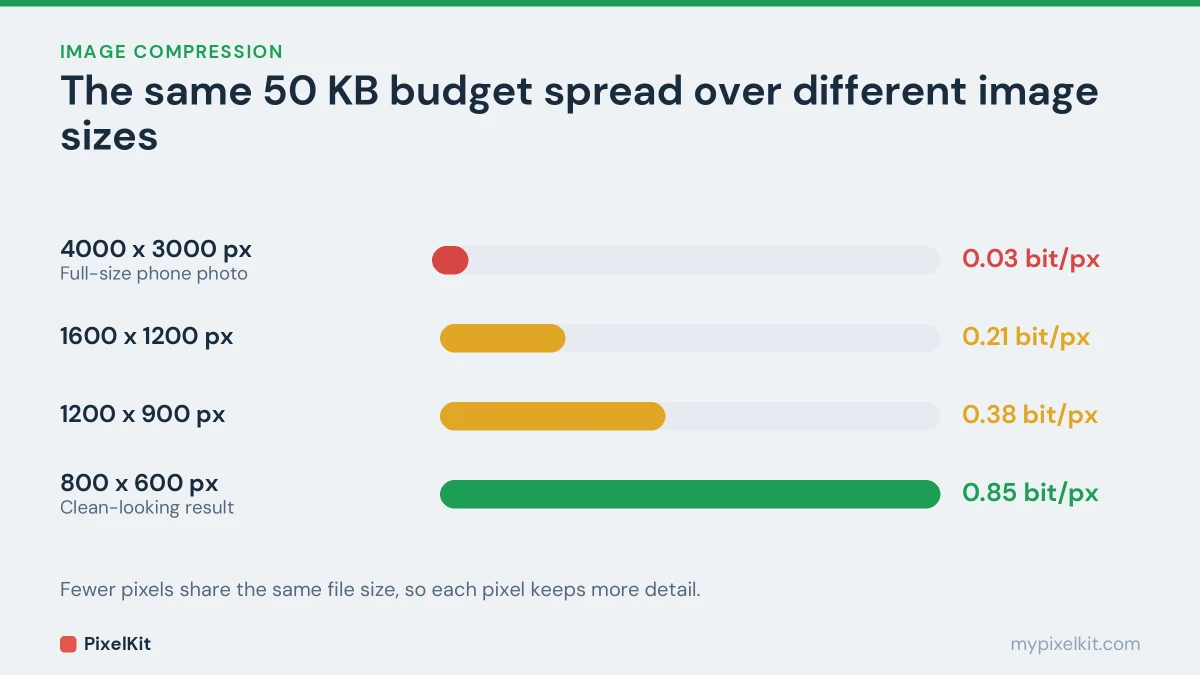
Think of 50 KB as a budget. It is about 400,000 bits of information. Spread over a 12-megapixel phone photo, that works out to roughly 0.03 bits per pixel, far too little to describe the picture. The compressor has no choice but to throw away almost all the detail, and you get blocks and smears.
Spread the same budget over an 800 × 600 image (480,000 pixels) and each pixel gets around 0.85 bits, which is enough for a clean-looking JPG. The file size limit is the same; the picture simply has fewer pixels to share it.
So when the result looks bad, don’t lower the target further. Reduce the pixel dimensions first with Resize Image, then compress. These starting points work well for typical photos:
| Target file size | Good starting size (long side) |
|---|---|
| 20 KB | About 500 px |
| 50 KB | About 800 px |
| 100 KB | About 1200 px |
| 200 KB | About 1600 px |
| 500 KB | About 2400 px |
| 1 MB or more | Most phone photos fit without resizing |
Simple images, like a signature on white paper or a passport photo against a plain background, compress better than this and can stay larger. Busy scenes full of leaves, gravel or low-light grain compress worse and may need to be a little smaller.
If the form also states exact dimensions, use those instead. For the bigger picture of how dimensions, format and compression work together, see our complete guide on how to reduce image file size.
KB, kB and KiB: aim slightly under the limit
“50 KB” does not mean the same thing everywhere. Some websites count 1 KB as 1,000 bytes, others as 1,024, so a 50 KB limit might be 50,000 or 51,200 bytes. Your computer can add to the confusion: Windows File Explorer counts in units of 1,024 bytes, while macOS Finder counts in units of 1,000.
A file that your computer reports as exactly 50 KB can therefore still be rejected. Setting the target to 45–48 KB removes the guesswork and costs nothing visible.
Get the format right before you compress
The format of your original matters as much as the target size:
- A photo saved as PNG is a poor starting point, because PNG is lossless and has no efficient way to throw away detail. Convert it to JPG first with Convert Image, then compress.
- An iPhone photo in HEIC format is rejected by many portals, which only accept JPG or JPEG. Turn it into a JPG with Convert to JPG.
- A WebP image saved from a website may also be refused. Convert it to JPG if the form lists only JPG and PNG.
JPG and JPEG are the same format with two spellings, so a form asking for JPEG will accept a .jpg file. To understand why JPG shrinks photos so much better than PNG, read lossy vs lossless compression.
Special cases
Passport, visa and ID photos
Official photo portals usually specify dimensions, a shape (often square) and a maximum size. Deal with them in that order: crop to the required shape with Crop Image, resize to the required pixels, and compress last. A plain, evenly lit background compresses very well, so these photos can usually stay sharp at 50 KB. Zoom in on the result and make sure the eyes and the edges of the face are crisp. Our step-by-step guide to resizing a photo for a passport or visa application covers the whole process.
Signatures and scanned documents
Crop tightly around the signature or the part of the page you need. A signature on a white background, cropped close and resized to around 400–600 px wide, usually fits well under 20 KB. If the form asks for a PDF rather than an image, build one with Image to PDF; our guide on converting JPG images to PDF shows how to keep it small.
Screenshots and images with small text
Heavy JPG compression smears the sharp edges of letters. Resize less aggressively, compress, and check that the smallest text is still readable before you upload.
Compressing to 20KB, 100KB, 200KB or 1MB
The process is identical for every target: set the slider to the limit, compress, check the result. Use the table above to decide whether to resize first. For limits of around 1 MB and above, compression alone is enough for nearly any phone photo.
Some forms also set a minimum size, such as “between 20 KB and 50 KB”. In that case set the target close to the maximum rather than as low as possible, so the file stays inside the range and keeps as much quality as it can.
Compress image to 50KB: quick recap
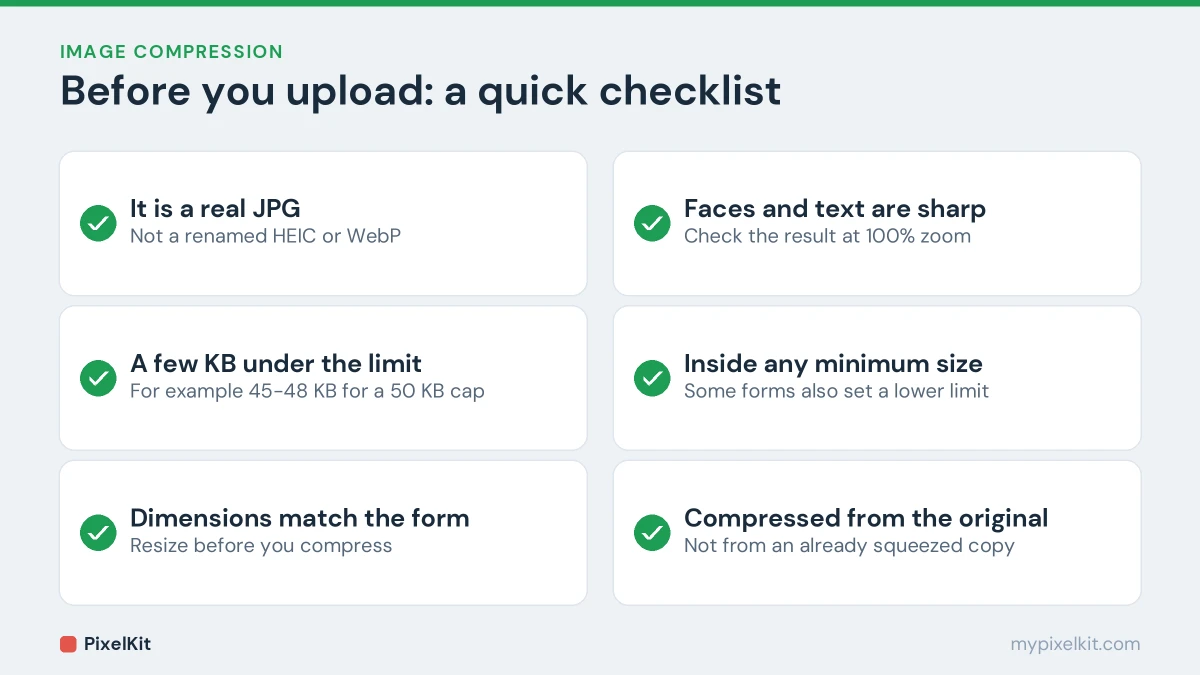
To compress image to 50KB reliably, start from the original, convert HEIC or PNG photos to JPG, shrink very large photos to a sensible width, then set the target just under 50KB in Compress Image. Aiming a little below the limit leaves room for the way some portals count kilobytes. The same steps work when you need to compress image to 50KB for an exam form, a job portal or an ID upload, and they scale to 20KB, 100KB or 200KB targets too.
Frequently asked questions
Why is the result still over the limit?
A very large or very detailed image may not be able to reach a tiny target at its full dimensions. Resize it using the table above and compress again. Also check whether the site counts kilobytes in units of 1,000 bytes; if so, aim a little lower.
Can I compress an image to 50KB on my phone?
Yes. Open Compress Image in Safari, Chrome or any other mobile browser, choose the photo from your gallery and download the result. It works the same as on a computer.
Is my photo uploaded to a server?
No. PixelKit compresses the image inside your browser using its built-in image engine. Nothing is sent to or stored on a server.
The website still rejects my photo. What else could be wrong?
File size is only one of several checks. The format, the dimensions, the aspect ratio or even the orientation of the photo can trigger a rejection. Our guide to rejected photo uploads walks through each cause and its fix.
Sources and further reading
- Kilobyte (Wikipedia): Why a kilobyte can mean 1,000 or 1,024 bytes depending on who is counting.
- JPEG (Wikipedia): How the JPEG format compresses photos, from block transforms to quality settings.
- Digital image requirements (U.S. Department of State): Official size, format and file size rules for digital US visa photos.
- Using HEIF or HEVC media on Apple devices (Apple Support): Apple's explanation of HEIF/HEIC photos and the compatibility settings on iPhone.