Quick answer: To remove background from product photo, shoot it against a plain background that contrasts with it, then run the photo through Remove Background to get a transparent cut-out. For a white background, convert that cut-out to JPG with Convert Image, which fills the transparent area with white. Finish by cropping to a square, resizing and compressing.
In this guide
Clean, consistent product photos make a shop look trustworthy, and they are often required: many marketplaces want the main image on a plain white background. You don’t need a studio or a design subscription to get there. A phone, a window and a few free browser tools will do. This guide covers how to shoot products so the cut-out is easy, the exact steps to remove the background, and how to produce a finished white-background image ready for your listing.
Why clean product backgrounds matter
- Consistency. A catalogue where every product sits on the same background looks professional and is easier to browse.
- Marketplace rules. Amazon, for example, has long required a pure white background for main product images, and other marketplaces have similar rules. Check each platform’s current image guidelines before you list.
- Flexibility. A transparent cut-out can be placed on white for the listing, on a colored banner for a sale, or into a lifestyle mock-up, all from one photo.
Shoot for an easy cut-out
The better the original photo, the cleaner the result. A few habits make a big difference:
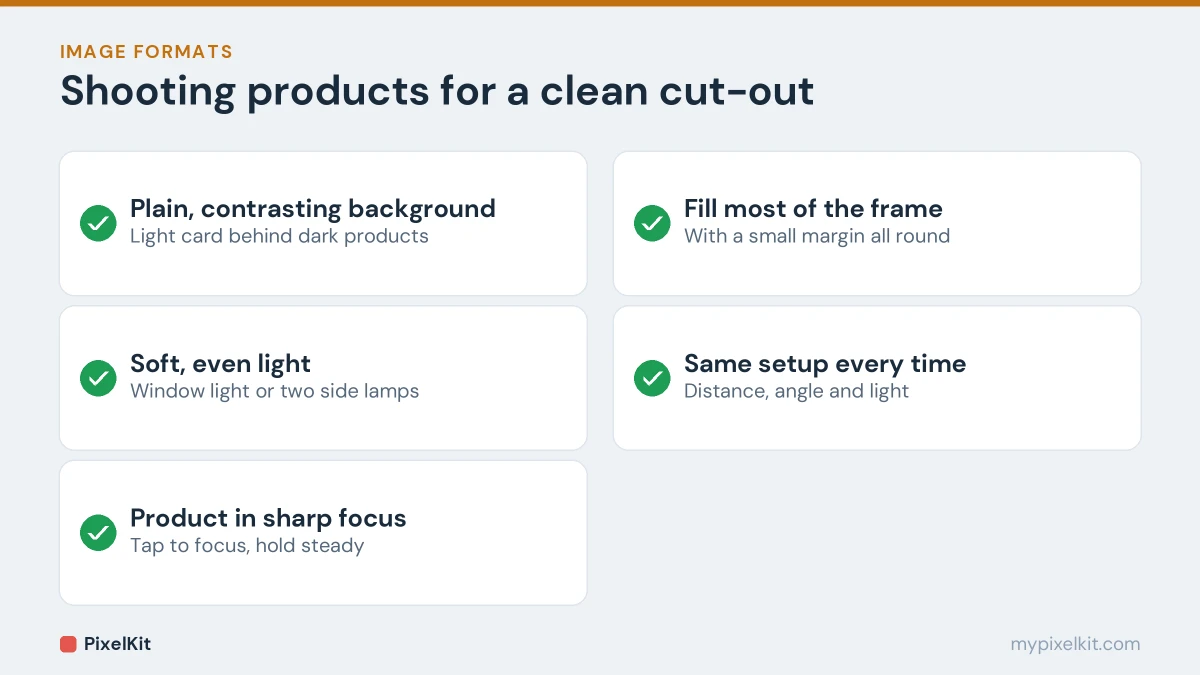
- Use a plain, contrasting background. A sheet of white card behind a dark product, or a darker surface behind a light one. The model separates subject and background most reliably when they look clearly different.
- Use soft, even light. Diffused daylight from a window, or two lamps from either side, avoids harsh shadows that can be mistaken for part of the product.
- Keep the product sharp. Tap to focus on it, hold the phone steady, and avoid low light, which adds grain.
- Fill the frame, but not completely. Get close enough that the product is large in the photo, with a little space around it so no edge touches the border.
- Shoot from the same distance and angle for every product in a range, so the finished images match.
Step by step: remove the background
- Open Remove Background on your phone or computer.
- Add the product photo. The first time, the AI model has to download to your browser, so allow a little extra time. Later photos are much faster.
- Check the edges. Zoom in on corners, handles, labels and any thin parts. If a piece is missing, reshoot with more contrast rather than trying to patch it.
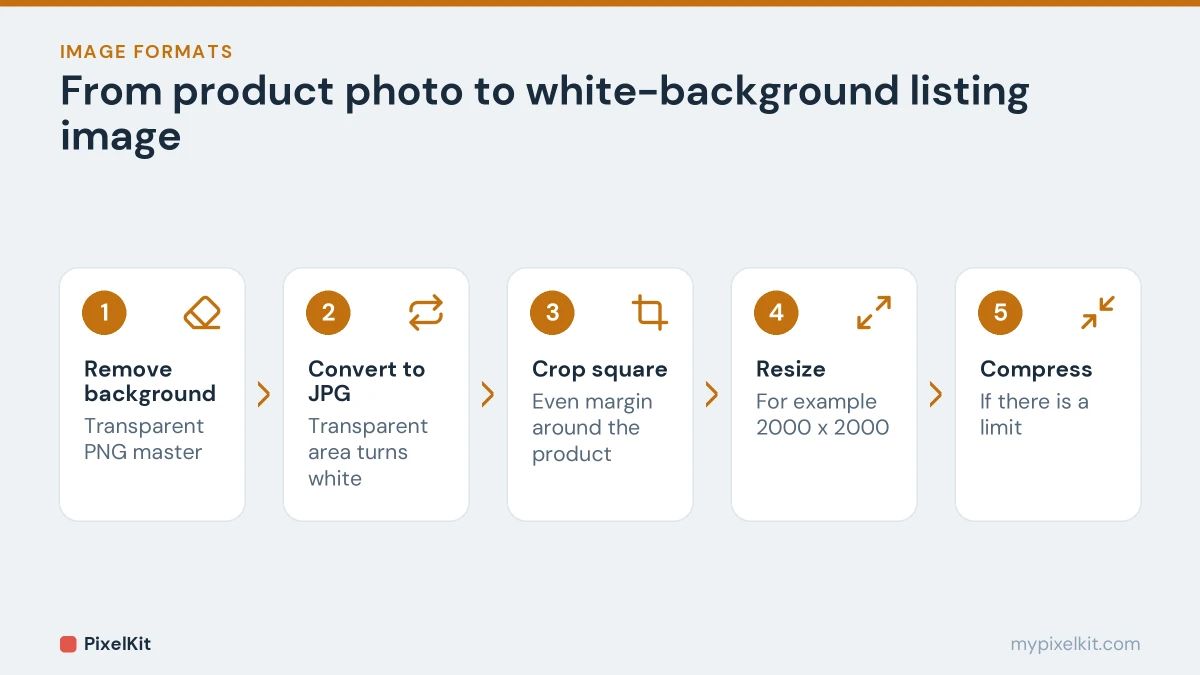
- Download the PNG. This is your transparent master copy. Keep it.
The whole process runs on your own device, so unreleased products and client photos are never uploaded to a third-party server.
Put the product on a pure white background
- Open Convert Image, add the transparent PNG and choose JPG as the output. Because JPG can’t store transparency, the transparent area is filled with white.
- Open the JPG in Crop Image and crop it to a square, keeping the product centred with an even margin on all sides. Many sellers let the product fill most of the frame; Amazon’s guidance, for instance, has long been that it should fill about 85% of the image.
- Resize it with Resize Image to your platform’s recommended size. Many marketplaces recommend at least 1000 pixels on the longest side so shoppers can zoom in; 2000 × 2000 is a common choice.
- Compress it with Compress Image if the platform has an upload limit or if the image is for your own website.
For more on getting squares and other ratios right, see how to crop an image to a square, 16:9 or any ratio.
Keep the transparent version too
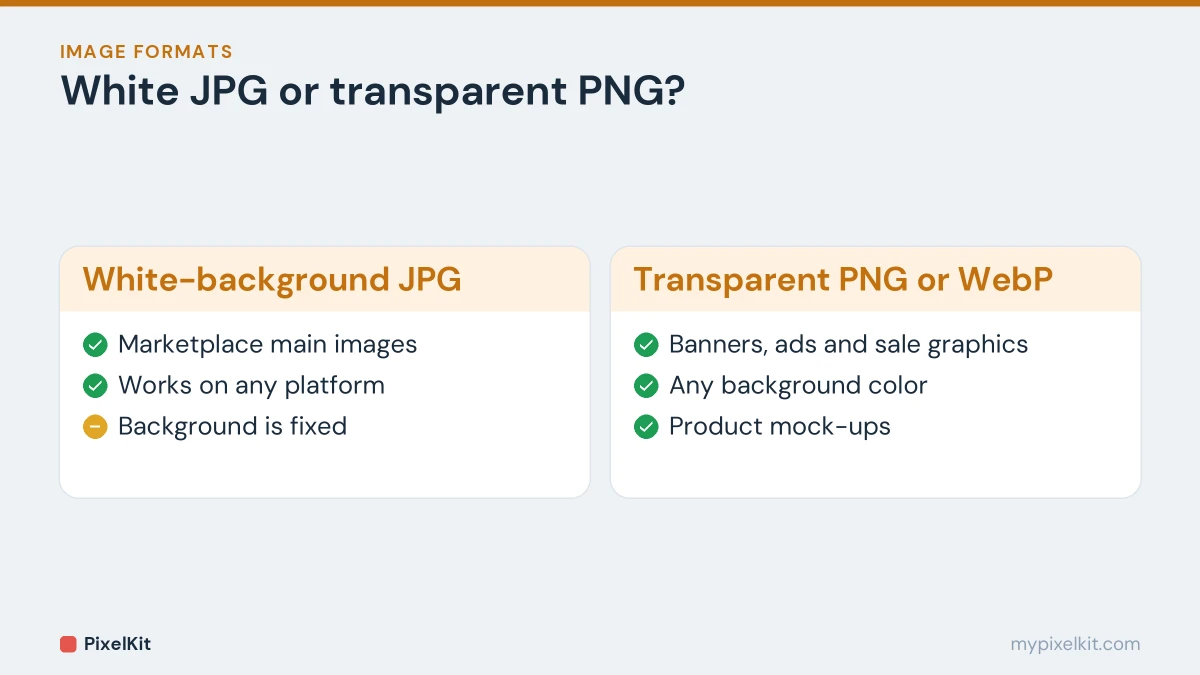
The white JPG is for your listing. The transparent PNG is for everything else: banners, social posts, ads on colored backgrounds, and product mock-ups. If you use cut-outs on your own website, convert them to WebP with Convert Image to keep the transparency in a much smaller file. Our guide on making an image background transparent explains why transparency disappears when a file is saved as JPG, and how to avoid it.
Common problems and how to fix them
| Problem | Likely cause | Fix |
|---|---|---|
| Part of the product is missing | It is a similar color to the background | Reshoot on a background with more contrast |
| A shadow stayed attached | Hard shadow touching the product | Use softer, more even light, or move the product away from the background |
| Rough or jagged edges | Small or blurry original | Shoot closer, in focus, in good light |
| Glass or clear plastic looks odd | See-through objects are hard to separate | Use a plain background and check the result closely; some items may need manual editing |
| White background turned grey | The photo’s background, not the fill, is showing | Make sure you converted the transparent cut-out, not the original photo |
Keep a whole catalogue consistent
- Use the same lighting, background and camera distance for every product.
- Crop every image with a similar margin and resize them all to the same dimensions.
- Name files clearly, for example ceramic-mug-blue-front.jpg, which helps you and search engines.
- Keep file sizes light. Product pages with dozens of heavy photos load slowly; our guide to optimizing images for a faster website covers the details.
Remove background from product photo: quick recap
To remove background from product photo files cleanly, shoot against a plain, contrasting backdrop, run the photo through Remove Background, and keep the transparent PNG as your master copy. For marketplaces that want white, convert that cut-out to JPG. When you remove background from product photo sets for a whole catalogue, keep lighting, framing and canvas size the same so your product photos look consistent.
Frequently asked questions
Is it free to remove backgrounds from product photos?
Yes. PixelKit’s Remove Background has no sign-up, no watermark and no limit on how many images you process.
What format should product photos be?
JPG on white is the safest choice for marketplace listings. Use PNG or WebP when you need the transparent cut-out. For a full comparison, see JPG vs PNG vs WebP.
Can I do this on my phone?
Yes. Every step works in a mobile browser, so you can shoot, cut out and prepare product photos on the same device.
Are my product photos uploaded anywhere?
No. The AI model runs in your browser, and your photos stay on your device.
Sources and further reading
- Image link [image_link] (Google Merchant Center Help): Google's image requirements for product listings.
- Product media (Shopify Help Center): Shopify's help on adding and managing product images.
- Image SEO best practices (Google Search Central): Google's recommendations for alt text, file names and image markup.
- background-removal-js (IMG.LY on GitHub): The open-source library that runs AI background removal in the browser.